Classes
At the top heading of the page, click on Classes to see a list of all your currently open classes.
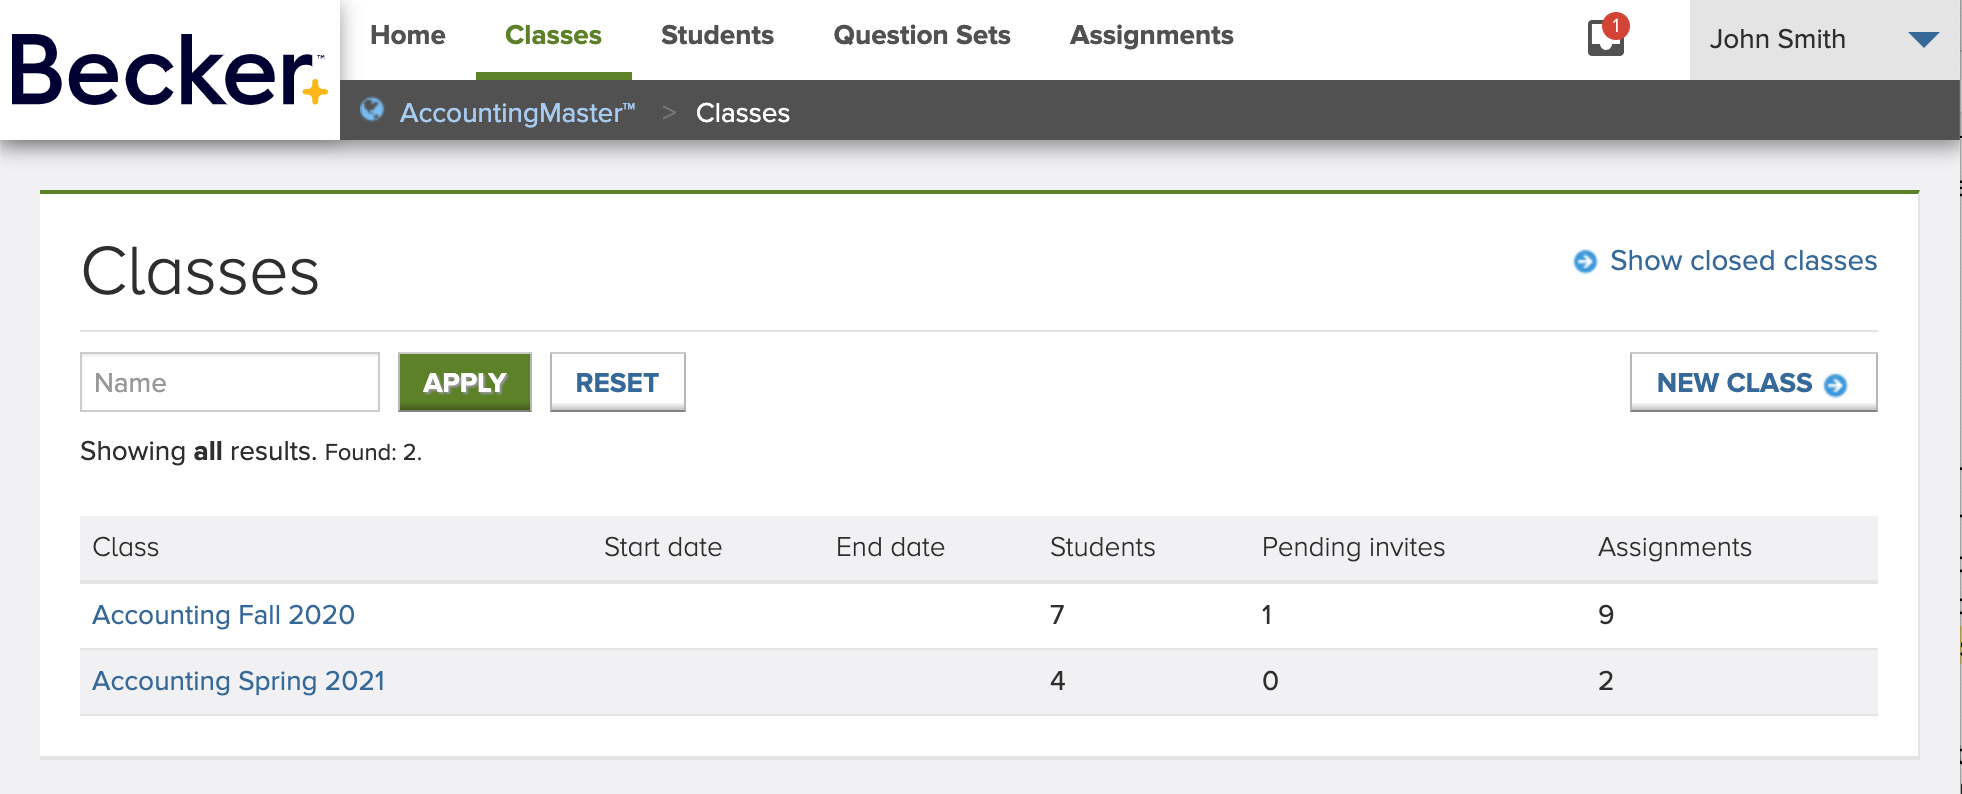
You can use the filter to search for classes, by their Name.
To switch between open and closed classes, use the provided links “Show closed classes” and “Show open classes”.
Clicking on a class name link, will take you to that class details page.
New Class
To create a class, click on New Class. It will display the following dialog:
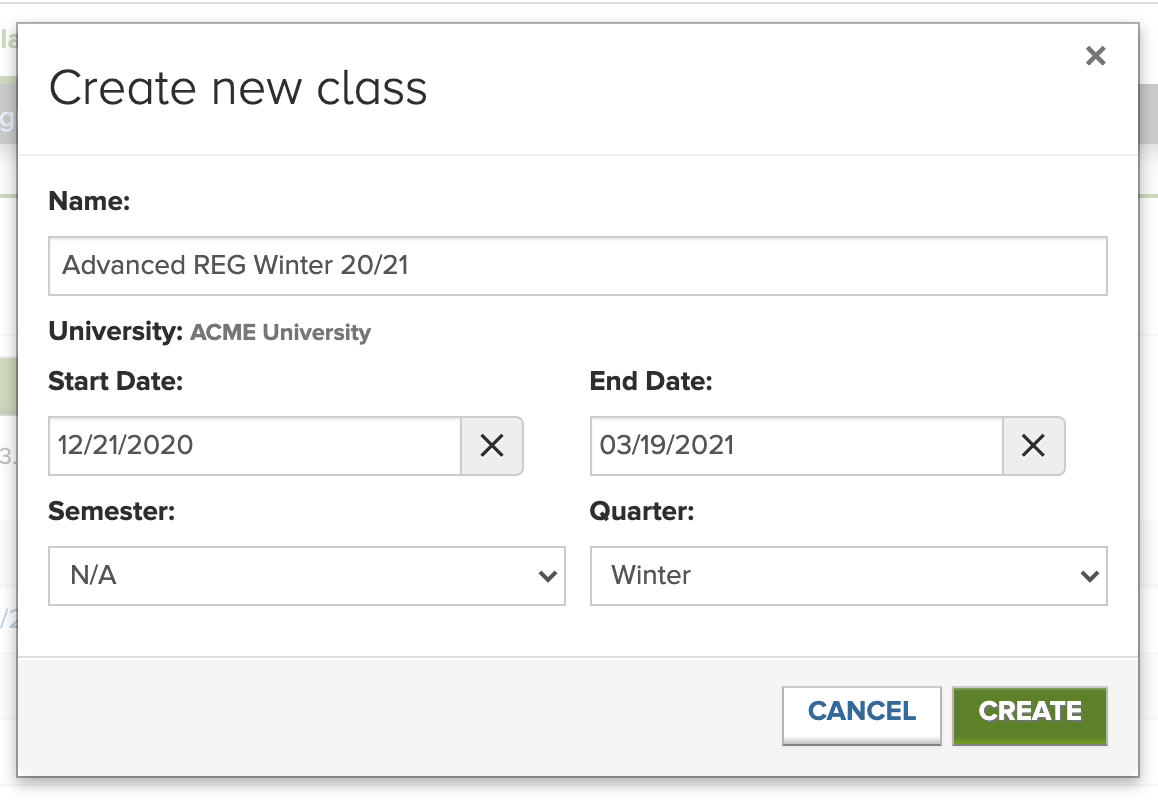
Fill out the form with the following fields:
- Name: the name of the class; must be different from your existing classes
- Start Date / End Date: the first and last day of your class; assignments of classes outside of these dates won’t be displayed on the home page
- Semester / Quarter: informational data to categorize your classes
All the fields are optional, except for Name, which is required. Click Create to submit the form.
Class Details
This page presents all the information related to a class, including its Assignments and Students.
The top panel displays the detailed settings of the class.
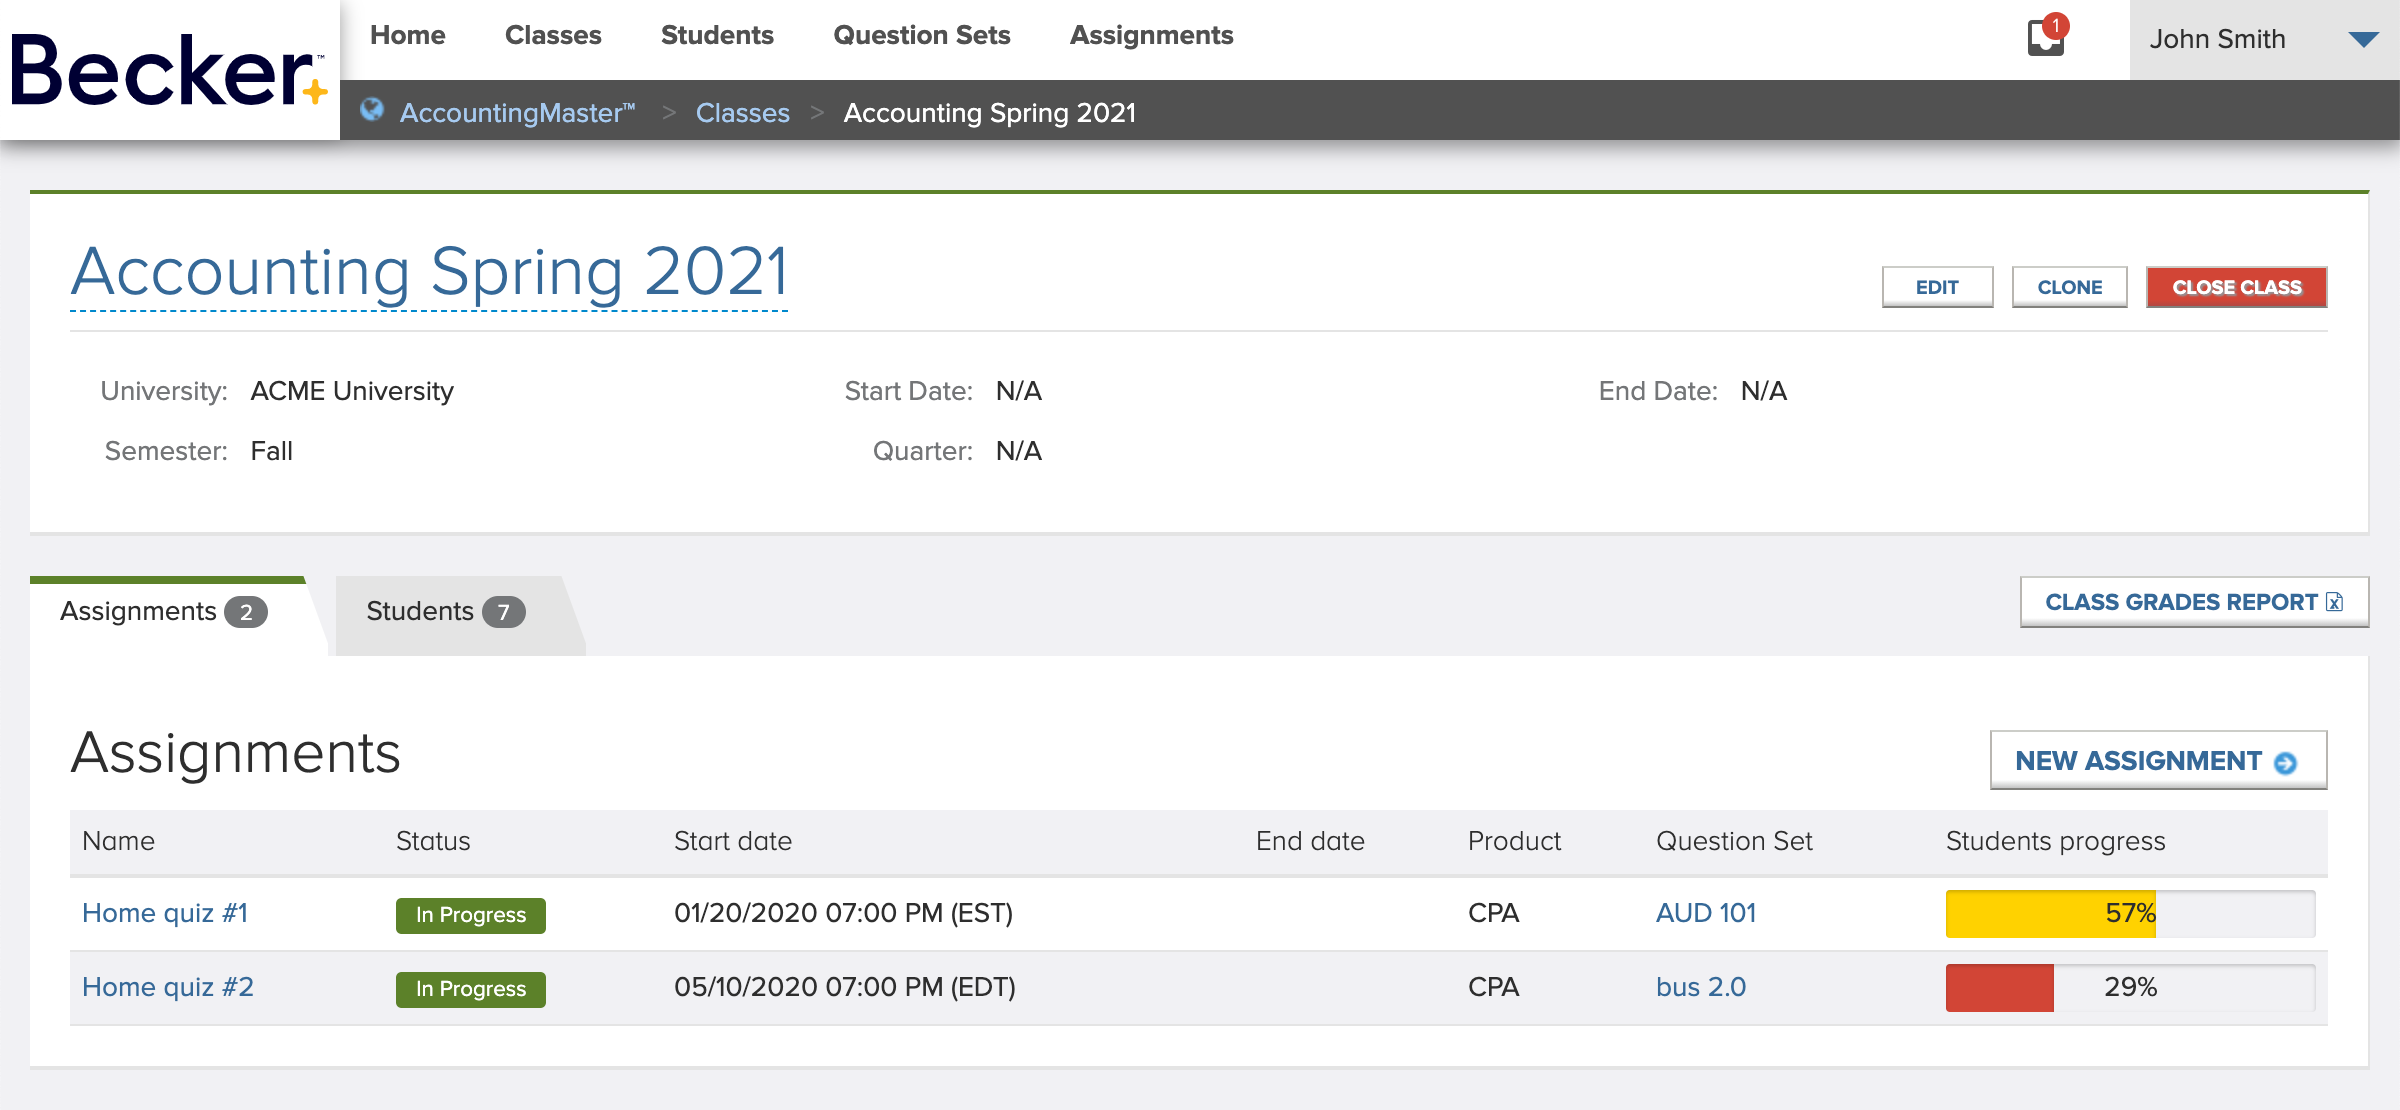
You can change the settings of the class at any time by clicking on the Edit button – it will display a editing dialog similar to the one presented when creating a class. To rename the class, click on its name, type a different one, and click the confirmation button.
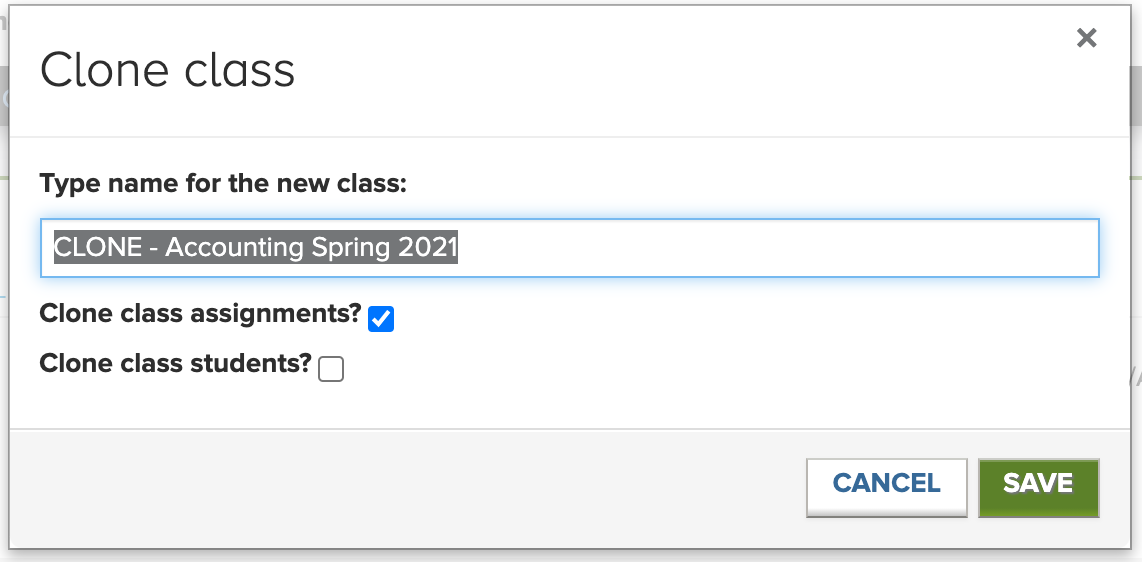
Clone Class
If you want to create a copy of this class, click on the Clone button. Once the dialog opens, type a name for the new class and the system will build a class with the same details and, optionally, with the same assignments and/or students, according to your selection in the checkboxes “Clone class assignments?” and “Clone class students?”.
Close Class
Closing a class allows you to effectively remove old data from your list of open classes. Assignments of closed classes will become unavailable for students and won’t be displayed anymore in your home page. To close a class, click on the Close class button and confirm your action by reading the warning that is displayed and clicking Yes, close.
Keep in mind that a class end date won’t be used by the system to automatically close it; it is informational only. Closing a class is always a manual action taken and confirmed by the user.
Class Grades Report
The Class Grades Report button allows you to download a spreadsheet file containing a detailed report of the results of all the students on all the class assignments.
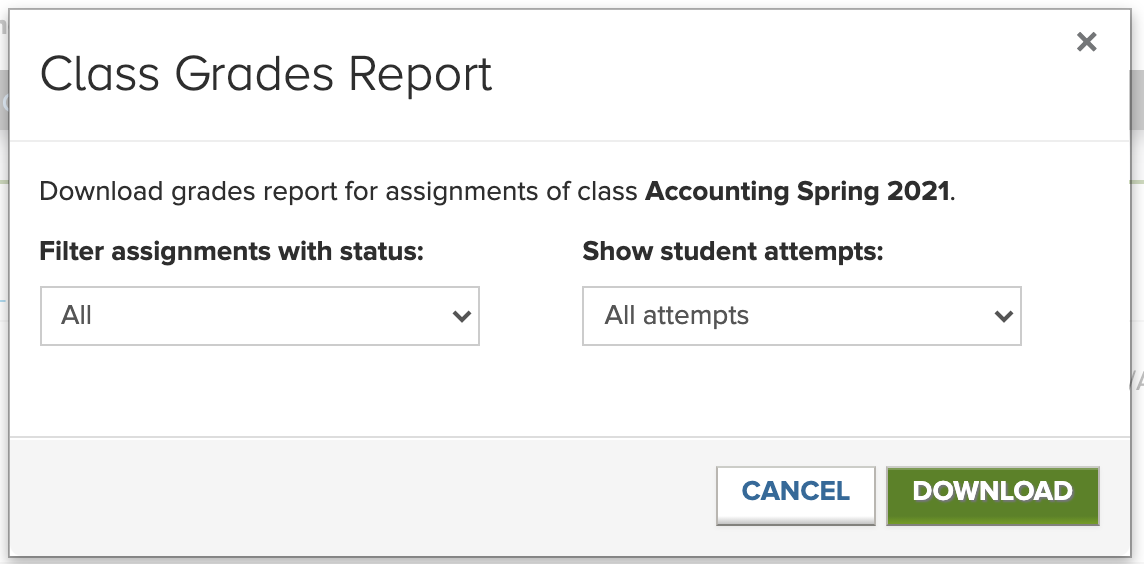
You can choose to include all the assignments (default) or filter them by their status. There’s also the option to select which student attempts the report should display:
- All attempts – all student attempts
- According to Score Policy – show most recent attempt or best attempt, according to each assignment settings
- Most recent attempt – the most recent attempt of every student for every assignment, regardless of their Score Policy
- Best attempt – the best attempt of every student for every assignment, regardless of their Score Policy
Assignments Tab
The default tab shows the list of all the assignments in the class with a summary of each one. You can create a New Assignment for this class right from here.
Students Tab
In the Students tab, you can see a list of all the students in the class including their enrolling status in the class, whether they are still Invited, already Registered, or even Disabled. Students are Invited the first time they are added to a class and move to Registered once they complete their enrollment from the invitation email they receive.
This tab also contains three buttons to add students to the class.
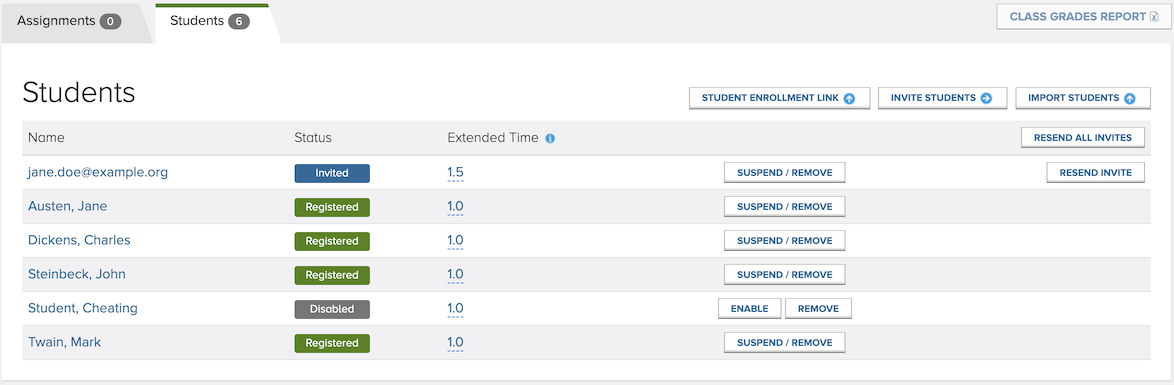
In the list of students, you have the following actions available, according to each student status:
- Suspend – disable student account and lock access to all his/her class assignments
- Remove – remove student account from class and delete all his/her assignments
- Resend invite – resend invitation email for an unregistered account
- Enable – enable a student account (which was previously disabled), unlocking access to all his/her class assignments
If you want to resend the invitation email for all your invited students at once, click the Resend all invites button in the table header.
ADA Extended Time
You can establish an extended time per student in a class according to ADA by defining a percentage between 0% and 200% of extra time the student has on every assignment. This value is only applicable to assignments that have a duration specified. To edit the value simply click over it on the student row.
Add Students
Students can be added to the class either by sending them an invitation email or by a registration link.
To send an invitation email, click on the Invite students button, which will display the dialog displayed below. Note that, if you’re using LTI, you don’t need to manually invite students and can skip this step, because their accounts will be automatically created with LTI.
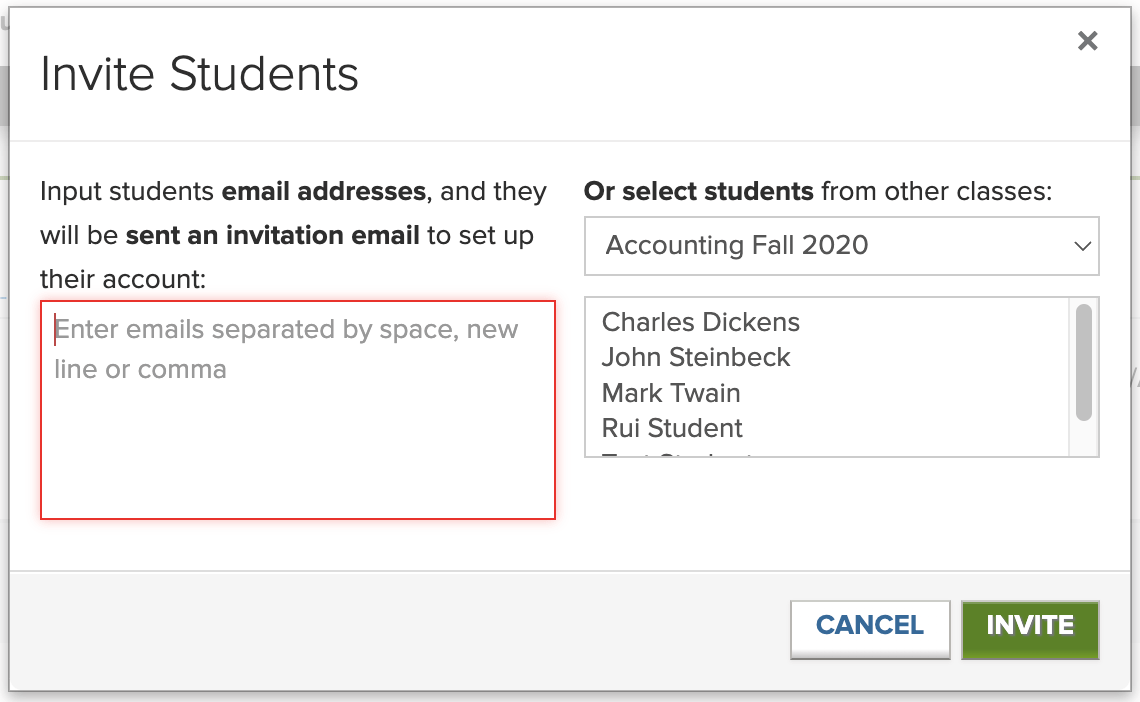
Enter emails separated by space, new line or comma and click Invite. You can also select students already enrolled in other classes, by selecting them from the list in the right side.
Students only need to register with AccountingMaster™ once. After they complete their enrollment for the first class, the system won’t send further emails when you invite them to subsequent classes. They’ll be automatically enrolled with the same existing account.
If you misspelled any student email address, you can edit their username to fix that and send them a new invite email.
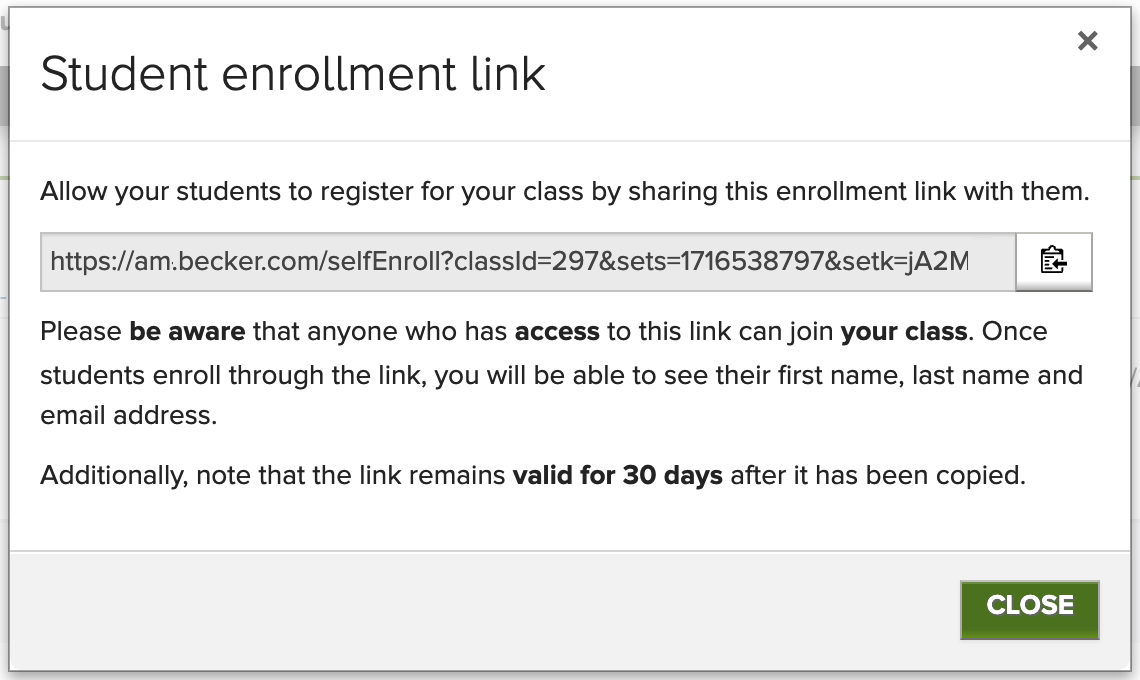
If you don't have your students' email addresses, you can allow them to self-enroll. Click on the Student enrollment link to generate a shareable link for student self-enrollment.
If you will be distributing your AccountingMaster™ assignments embedded in your institution LMS through LTI, you can Import students in bulk from a spreadsheet file. However, this process is designed for LTI usage only and is optional.