Assignments
At the top heading of the page, click on Assignments to see a list of all your assignments.
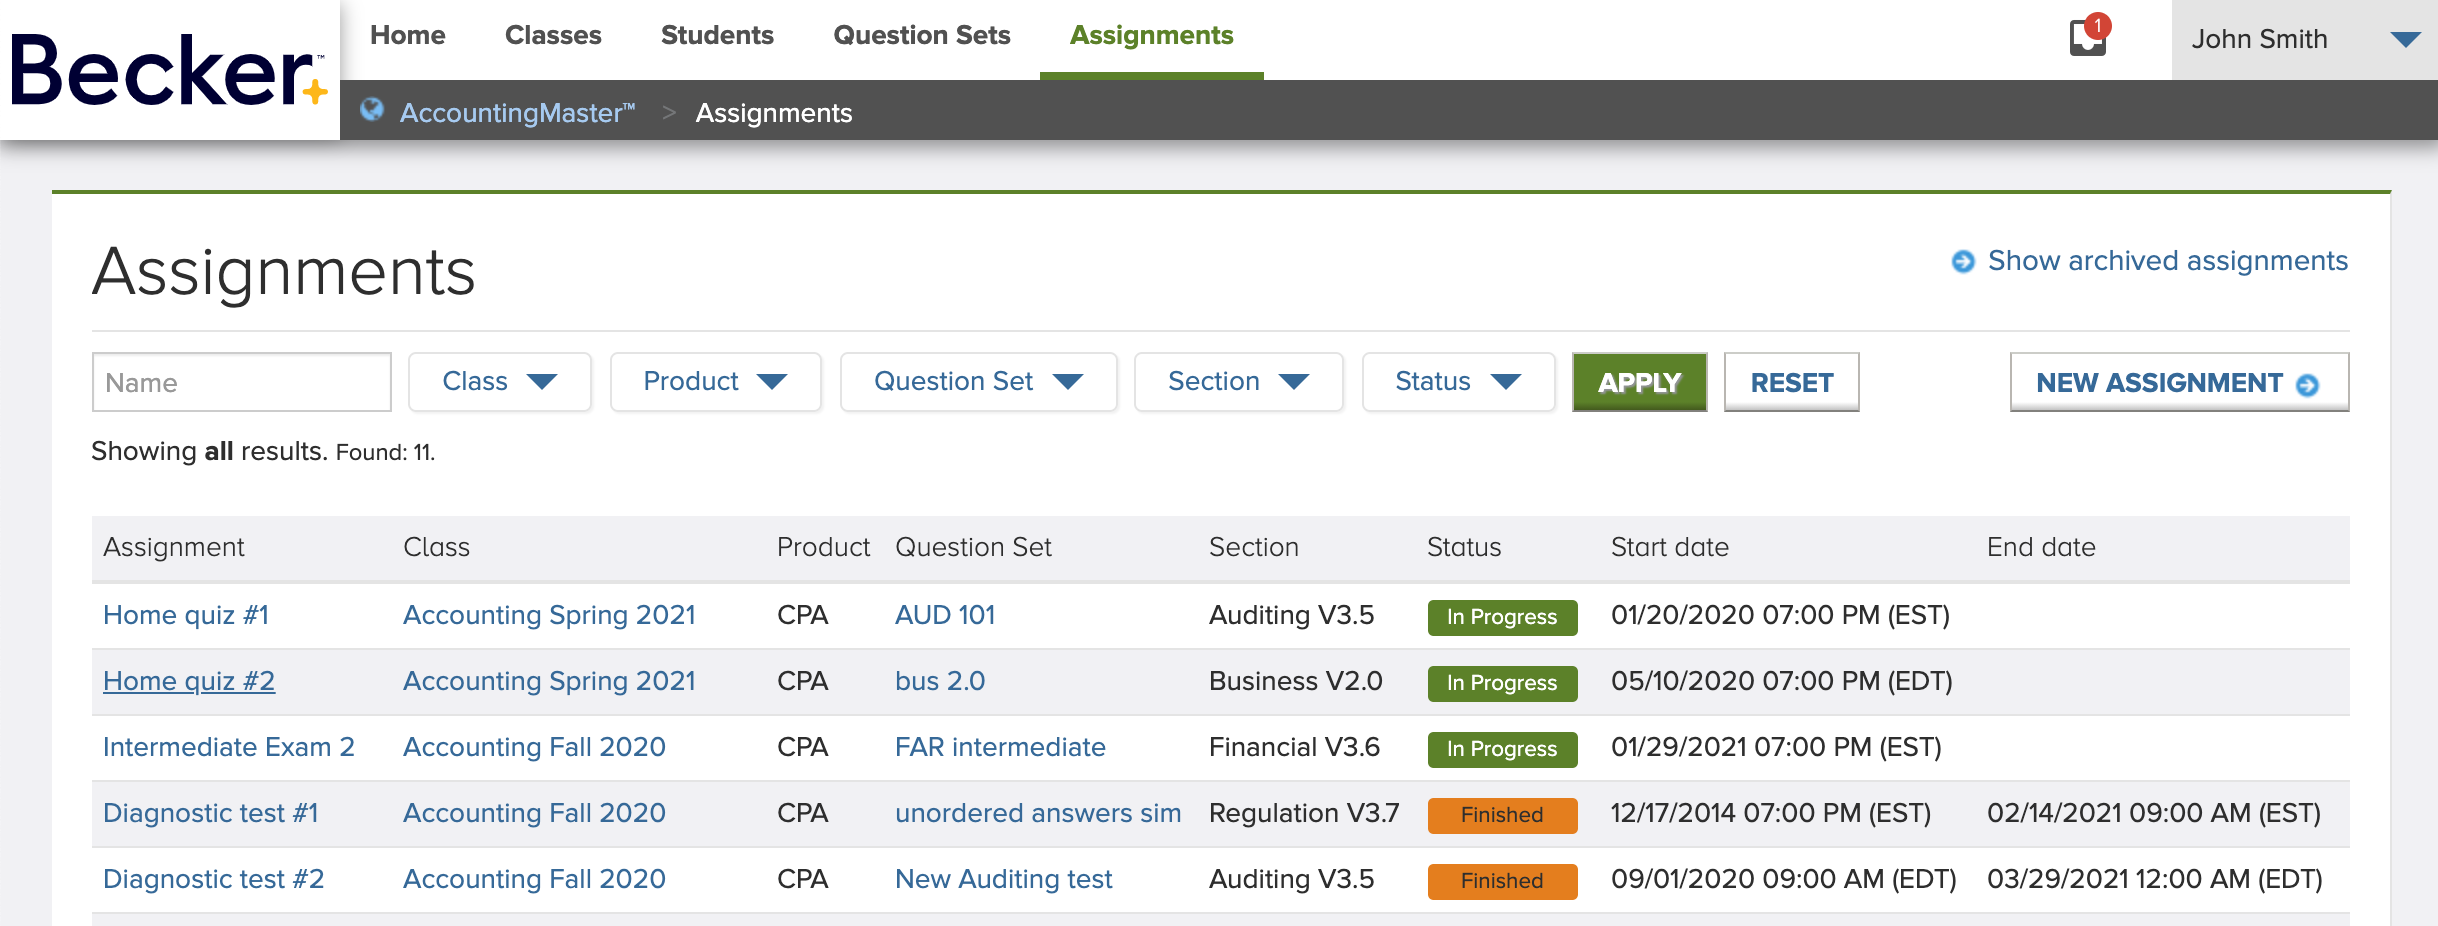
You can use the filter to search for a particular assignment, by their Name, Class, Product, Question Set, Section or Status.
To switch between current and archived assignments, use the provided links “Show archived assignments” and “Show open assignments”.
Clicking on an assignment name link, will take you to that assignment details page.
New Assignment
To create an assignment, click on New Assignment. It will display the following dialog:
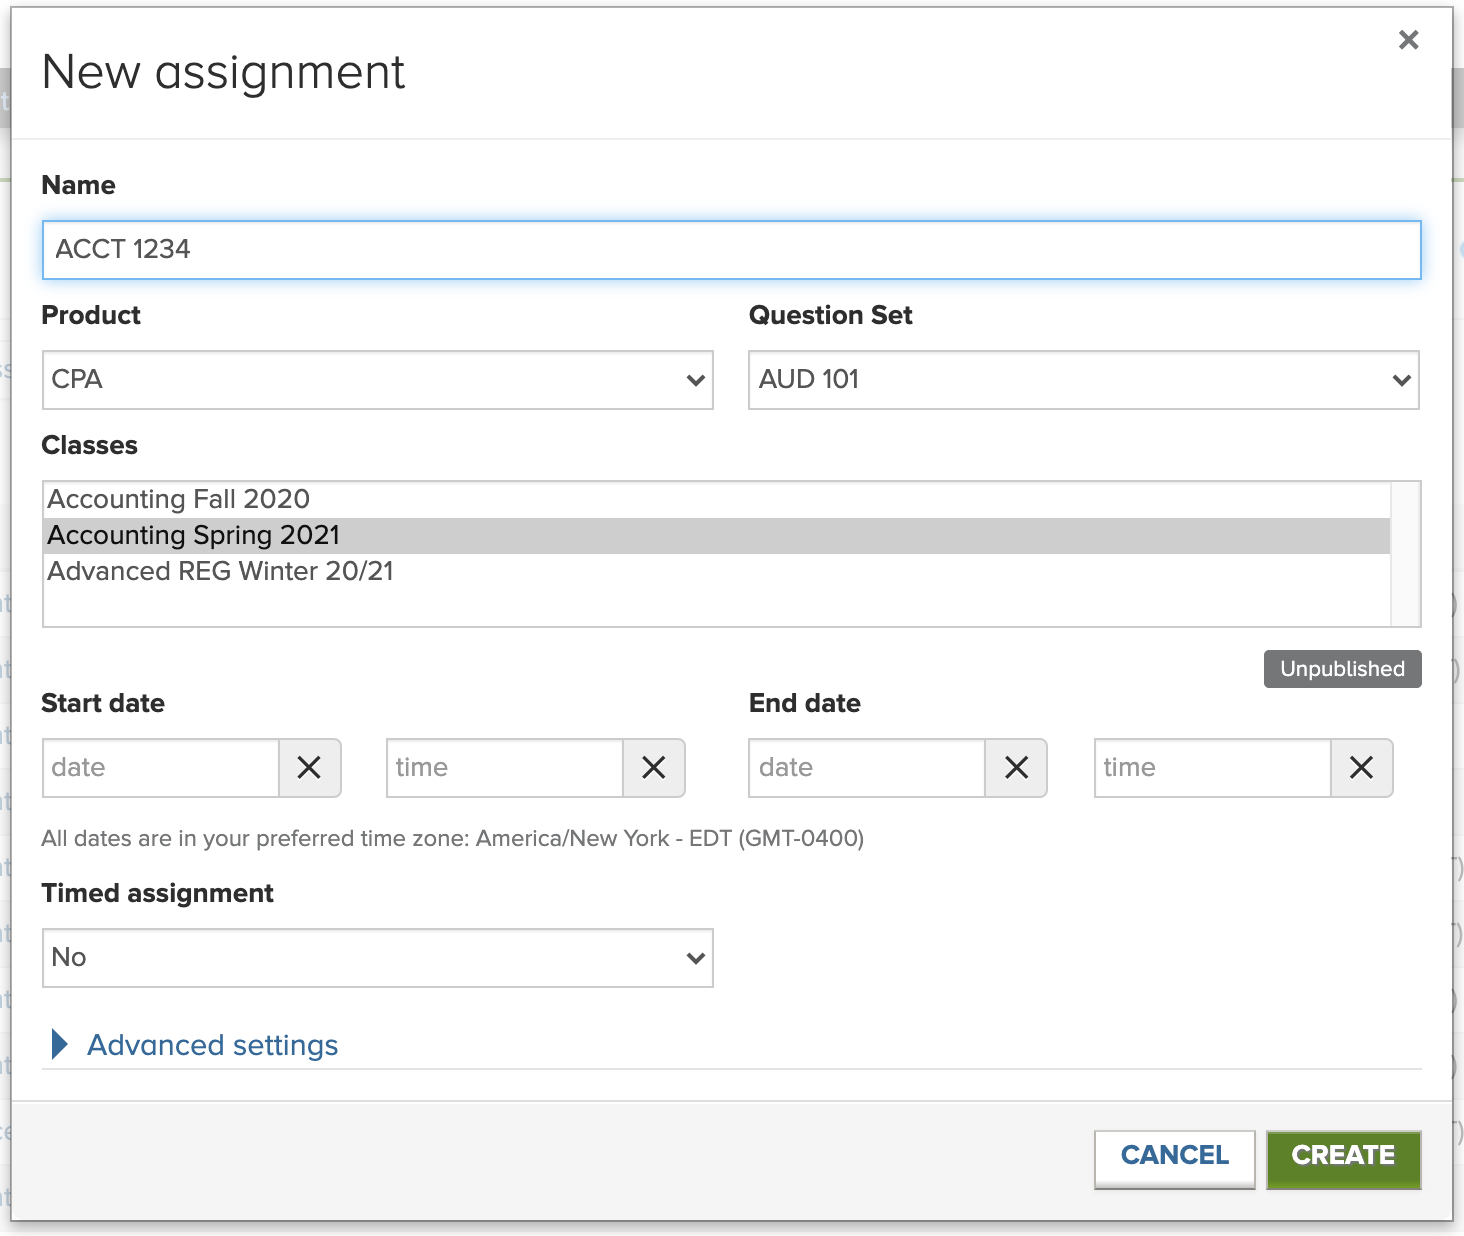
Enter a descriptive name for the assignment, select the product, a question set, a target class and configure the remaining settings for your assignment – click on Advanced settings to display other less common configurations. Click Create to submit the form.
Assignment Details
This page is where you can check and edit all the details about a specific Assignment. You can also track the progress of your students in the assignment and visualize statistics over their progress and score.
It consists of three main areas: Details, Statistics, and students’ Results at the bottom.
The main top area displays all the assignment settings and status.
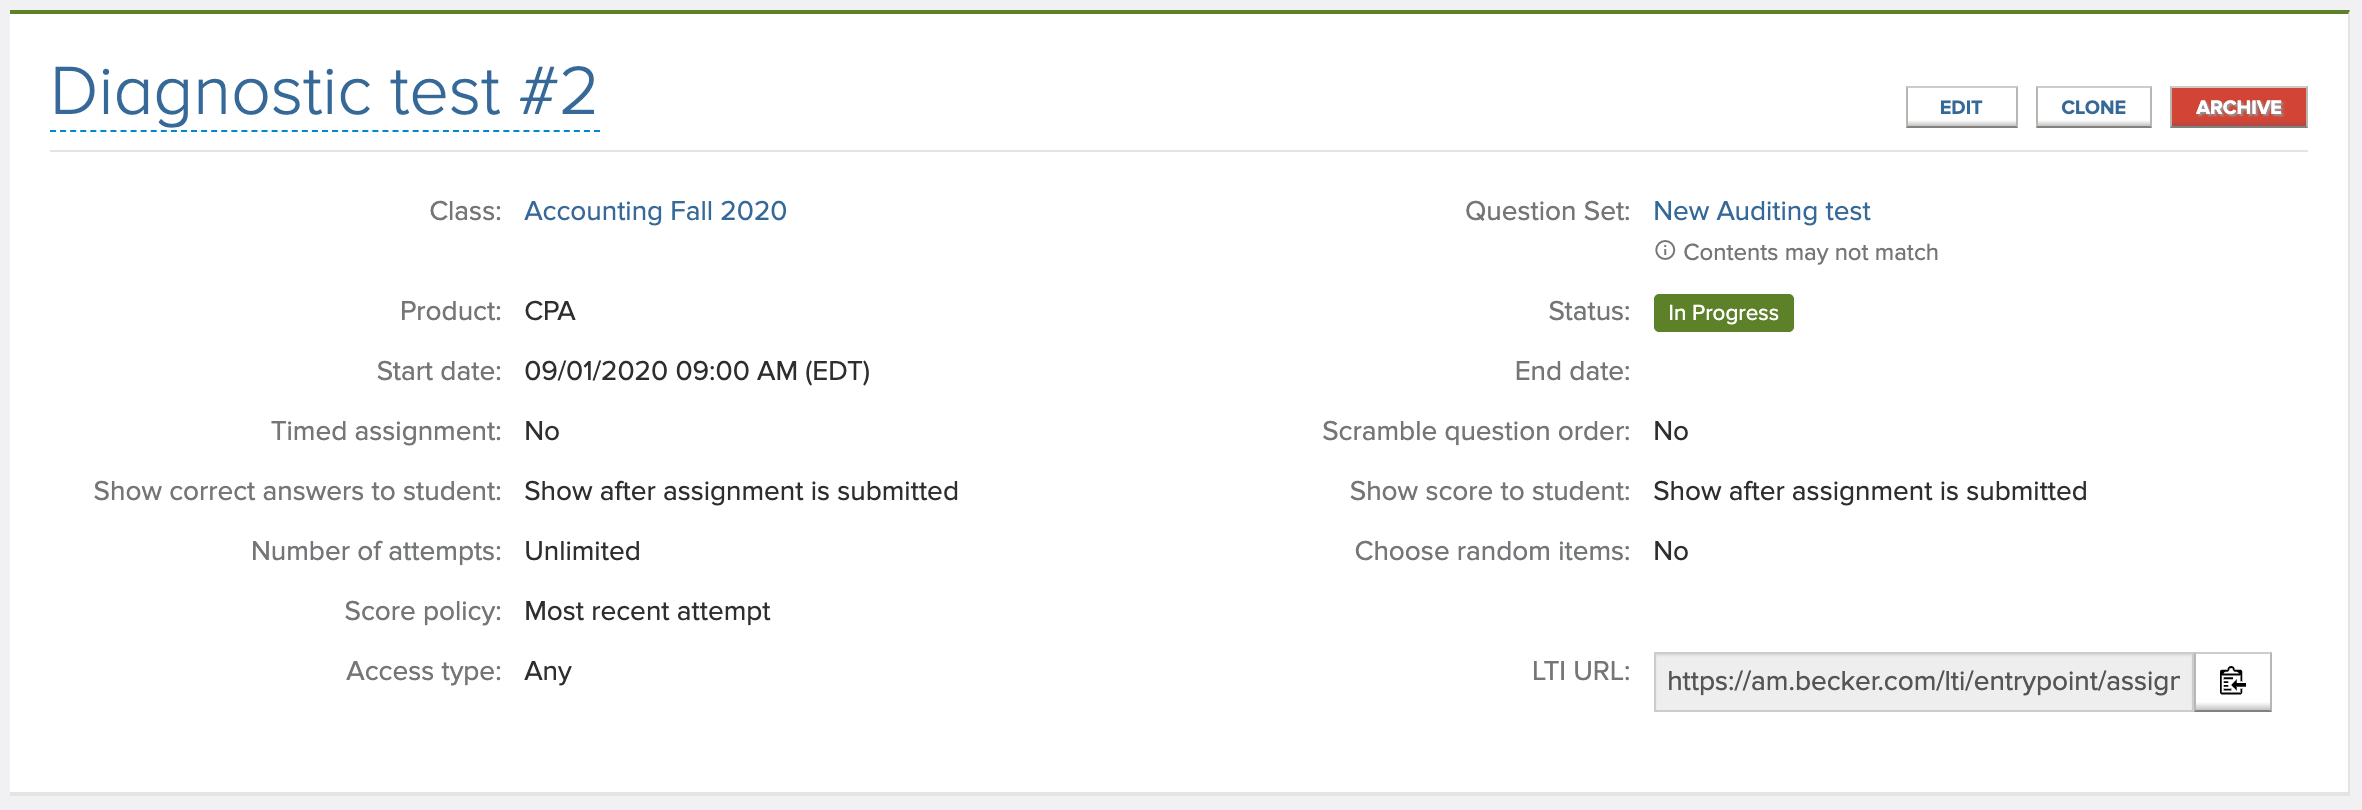
You can change the settings of the assignment at any time by clicking on the Edit button – it will display a editing dialog similar to the one presented when creating an assignment. To rename the assignment, click on its name, type a different one, and click the confirmation button.
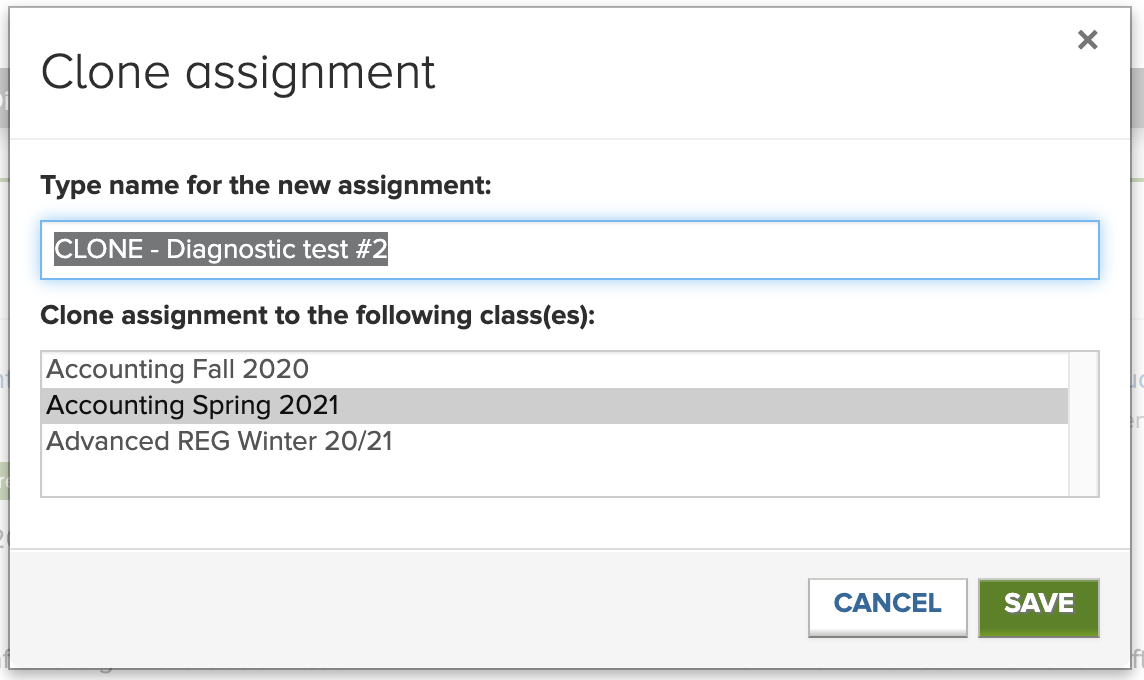
Clone Assignment
If you want to create a copy of this assignment, click on the Clone button. Once the dialog opens, type a name for the new assignment, select the class(es) where to publish the new assignment and click Save.
A copy of the assignment will be created in the selected class(es), with the same settings and no student progress.
Archive Assignment
If you’re not interested in keeping the assignment in your standard list, click on Archive. Archiving an assignment will set it unavailable for students and remove it from your home page, but students’ scores won’t be impacted. You can always find your assignments in the archived list and unarchive it later, if needed. Note: If the assignment has no student activity yet, the option to Delete will be available instead of Archive.
Statistics
The middle area presents a box with general statistics of the assignment, displaying the overall progress of students (students that turned in the assignment), as well as their average score and average time.

At the bottom, on the MCQs and TBSs tabs, you’ll find some statistics breakdown by each assignment item, for the students that turned in the assignment.
The Grades Report button allows you to download a spreadsheet file containing a detailed report of the results of all the students in the assignment.
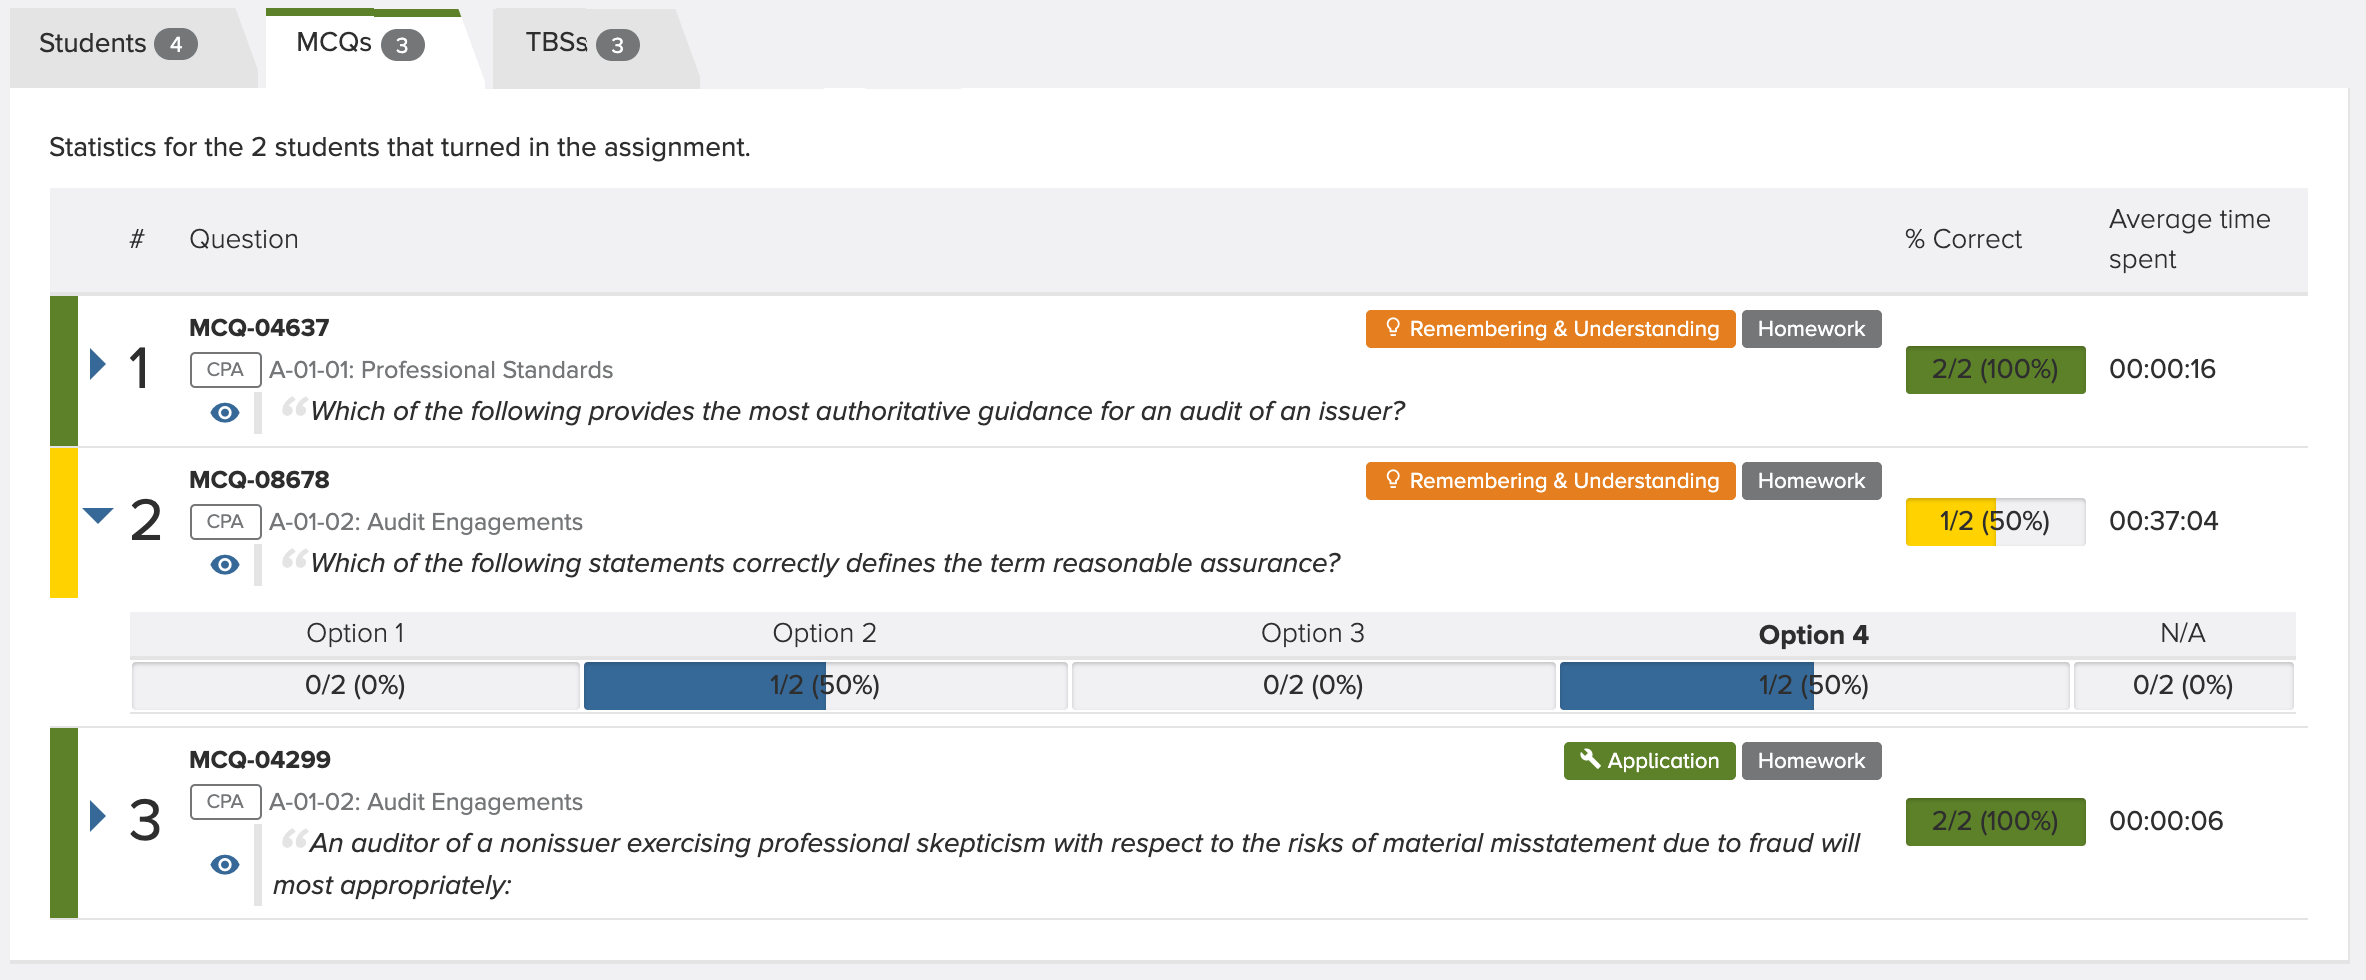
The colored vertical bar at the left is a visual indicator of trouble items, according to the threshold configured in the related question set.
Students results
The Students tab displays the progress and score of each student enrolled in the class for this assignment.
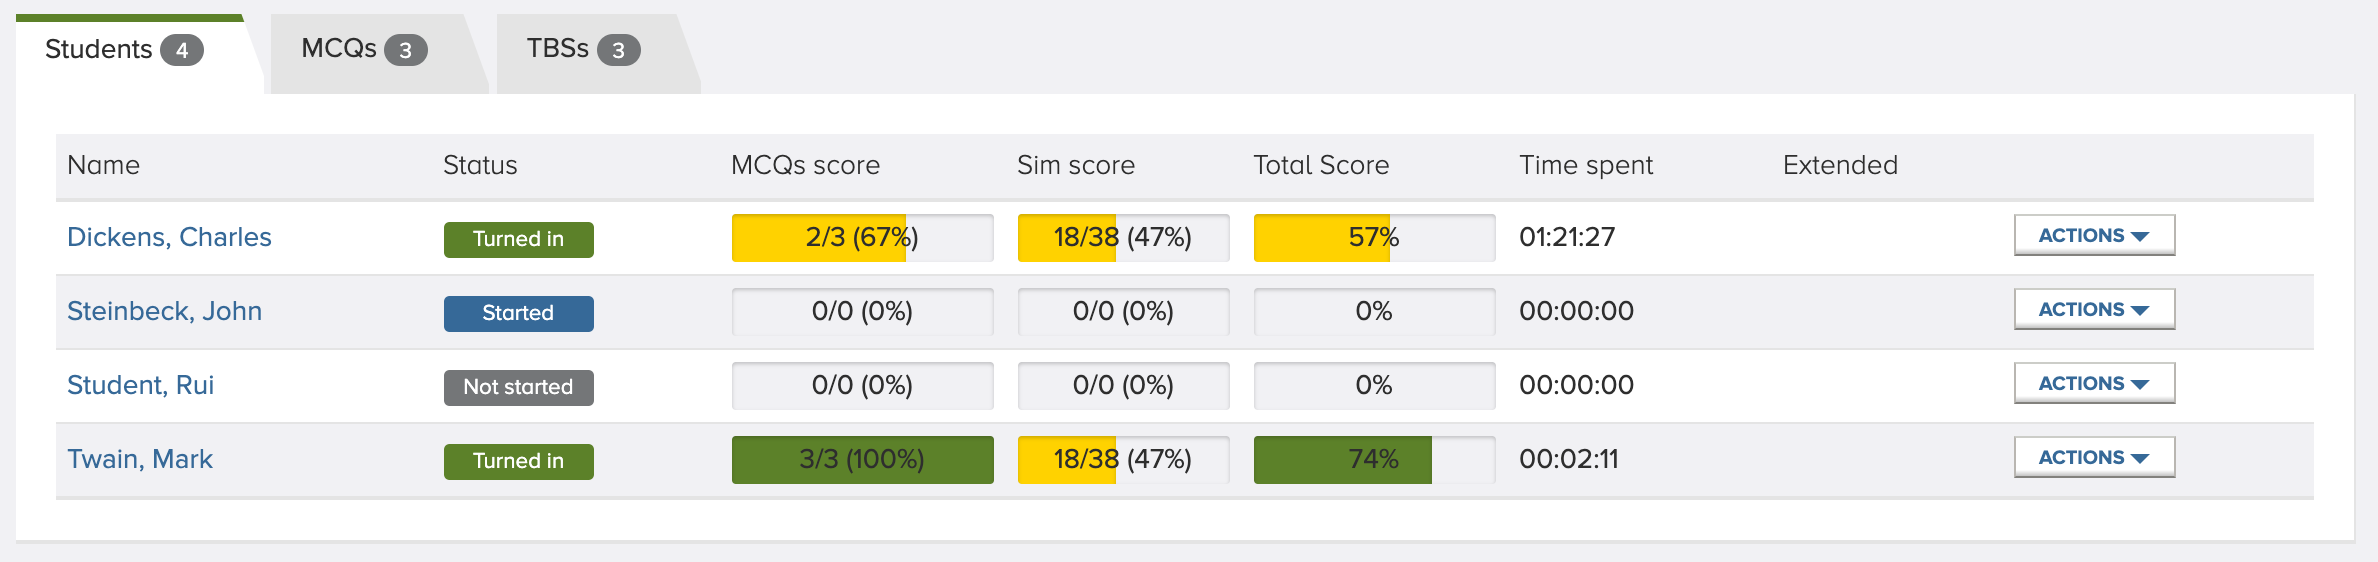
The table shows, for each student, the status on the assignment (Not started, Started or Turned In), the score (by testlet and total), the overall time spent and, if configured, the extended time. All this data is related to the significant attempt (see settings for more details) if the assignment allows multiple attempts. You can also take the same actions as in the student details page.
Assignment Settings
AccountingMaster™ assignments are highly customizable with settings that go from date/time availability to scoring or access policies. Time zone differences between faculty and students are handled seamlessly, as described above.
The following list describes all the available settings with their respective options and implications in the system:
- Start date – the date/time when the assignment becomes available for students to start it.
- Assignment is not visible to students while a start date is not set.
- Students can’t start the assignment before this date/time.
- Together with End date, determines the assignment status:
- No start date → Unpublished (not yet published to students);
- Start date in the future → Scheduled (visible, but not yet available to students);
- Past start date → In Progress (actively in progress, available to students);
- Past end date → Finished (ended, students attempt submitted, not available anymore).
- End date – the date/time when the assignment finishes, i.e., the last available date for students to submit their answers.
- If a student is still taking the assignment when this date is reached, the assignment is automatically submitted with the current answers.
- Timed assignment – whether to set a specific time duration, irrespective of the start or end dates.
- Students can take the assignment (start and submit) anytime between the Start date and End date. However, if the assignment is timed, the student has no more than the configured Duration, regardless of any break or if the student closed the browser – students can save their answers and resume the assignment later, but that time meanwhile elapsed will count for the assigned duration.
- The assignment is automatically submitted if the End date is reached or the Duration expires, whichever comes first.
- The Duration time starts counting from the moment the student starts the assignment.
- Duration – the amount of time set for a Timed assignment.
- Scramble question order – whether to randomly shuffle the order of the questions (MCQs and TBSs) for students.
- If this setting is turned off, then all students will see the questions in the same order as defined in the assignment.
- Show correct answers to student – when should the correct answers and solutions be available to students; four options:
- Don’t show
- Show after answering each question
- Show after assignment is submitted (default)
- Show after assignment end date
- Show score to student - when should the score be available to students; three options:
- Don’t show
- Show after assignment is submitted (default)
- Show after assignment end date
- Number of attempts – the maximum number of attempts that the student can take the assignment; from 1 (no retakes allowed) up to 10, or unlimited.
- If the number of attempts is higher than 1 or unlimited, the significant attempt is chosen according to what’s configured in Score Policy.
- Score Policy – the rule to choose the significant attempt of each student, when the students take the assignment multiple times: either the Most recent attempt or the Best attempt (attempt with best score).
- Choose random items – used to select a subset of questions out of all the assignment items, to help preventing student cheating. Three options:
- No – all students will get all the items in all their attempts.
- Yes, for each student – each student will get a random subset of items. All retakes will use that same subset.
- Yes, for all attempts – automatically select a random subset of items for each student attempt, even when retaking the assignment.
- Number of random items – the number of MCQs and the number of TBSs to select for the random subset.
- This setting is only available if Choose random items is different than No.
- Access type – how students should be able to access the system.
- Any – available to students on both AccountingMaster™ and your institution LMS.
- AM only – only available to students that log in to AccountingMaster™ directly.
- LTI only – only available to students through LTI integration.
- LTI with Grade Reporting – only available to students through LTI integration and entry parameters to report grade back to the LMS.
- This setting is only available for universities using the LTI feature.